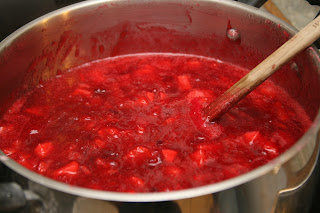
Yesterday, we headed to the local market to do our weekly stock-up of essentials. With us, we took our handy "Ball Blue Book guide to preserving" to see what kind of canning fun we wanted to get into, at the time. One of the first things that caught our eyes was their recipe for Cranberry-Apple Preserves. So, that, it was! Check it out...
The Goods:
- 2 lbs cranberries
- 3 green apples, cored, peeled, chopped
- 1 orange, seeded and chopped
- 3 cups sugar
- 2 cups water
- 1/2 cup honey
- Combine all of the ingredients in a large saucepot.
- Bring slowly to a boil, stirring until the sugar dissolves.
- Boil gently until almost to gelling point.
- Skim foam if necessary.
- Ladle hot preserves into hot jars, leaving 1/4 in headspace.
- Put on caps, seals and collars per directions.
- Process in a boiling-water canner 15 minutes.
Modifications and Specifications:
Relatively speaking, this is a really easy recipe. If there was just one thing that we would have done differently, it would have been to cut the apples into slightly smaller chunks. It would facilitate them breaking down just a bit more. As is, though, no complaints.
Since our local market had such large bulk bags of oranges and we didn't have any other orange recipes in mind, at the time, we went ahead and bought a couple of tangerines, instead. Since the tangerines were a bit smaller than what a typical orange would be, we went ahead and used one and a half tangerines. You wouldn't know the difference.
After you have combined all of the ingredients and are bringing them to a slow boil, you might have some confusion as to whether or not the sugar is dissolved. This is really a non-issue. All of the ingredients are combined anyways and you are boiling it during the entirety of the cooking process. So, don't worry about dissolved sugar being any kind of an indicator. I would stir pretty consistently throughout the process though. At first, you will stir more to be sure that everything is being heated and broken down evenly. After the fruits start to break down, you can stir less often, but still on a regular basis (every minute to two minutes or so).
If you are new to making preserves, jams and the like, you no doubt have questions about the "gelling point." There are a couple of ways that you can test it. The picture of the spoon shows us using the "Sheeting Test." This is done by taking a table spoon of your substance, tipping the spoon to the side (as if to pour it out) and observing the reaction. If you are getting more of a liquid consistency, it is obvious that the gelling point has not occurred. When the substance starts to come off of the spoon as if in a sheet (thus, the name), you have reached the gelling point. You can also use the "Plate Test" (cool some spread to room temperature on a plate, run your finger through it and, if it separates but goes back to its original form, it's at its gelling point) or by using a thermometer (determine boiling point for your altitude, add eight degrees Fahrenheit and, when your spread has reached that temperature, it will be at its gelling point).
As always, have your jars, lids, seals and collars "simmering" in a sauce pan of some kind while the entire process is occuring. Once you have filled the jars and secured the lids and collars "fingertip" tight (or secure the lid as your normally would for processing and turn back 1/4 in.), you are ready to process them in your boiling-water canner.
Prior to removing your jars from the canner after processing, allow them to sit in the canner (while canner is removed from the heat, of course) so that they can gradually decrease their external temperature. Immediately upon removal, tighten the collars as much as possible with a towel or oven mitt and let them cool on the counter for 24 hrs.
The Verdict:
Absolutely delicious! From just the right balance of tartness and sweetness to the aesthetic appeal, this one is a real winner. Another one that is a great gift to friends and loved ones for the upcoming holidays. Again, the recipe is incredibly simple, though it does take a bit of time. Another bonus is that it makes a decent amount of preserves. The recipe states that it should make appoximately 9 half-pints of preserves. In actuality, our batch made enough for 5 whole pints. Always important, every one of our 4ever recap reusable plastic canning lids sealed! We'll be enjoying this one for a pretty decent amount of time!
Have a favorite jelly or preserve that you would like to share? Tell us about it in our "Comments" section!
Otherwise...
Keep Calm
and
Can On


No comments:
Post a Comment